Locking Down Layers
Objectives:
- Use the layer locking feature to add control to your animation.
Locking Layers: The Mr. Potato Head Project
Let's say you are trying to do something complicated like make a face. You want the eyes to roll while the character's mouth smiles and frowns. This can be difficult because all the body parts keep getting in your way! The way around this problem is to create each part of the body in a different layer. After you finish a layer, you keep the others locked so you won't accidently move them out of place. Take a look at this example.
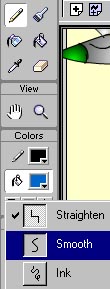
- Before you draw, click the pencil tool and select the option for smoothing the line.

- Start by drawing just the outline of a face.
- Double-click on the name Layer 1 and change it to say Face. It's important to start naming your layers.
- Add a new layer. Name it Mouth.
- Lock the face by clicking on the lock icon. Note how it toggles on and off as you click it.
This is how your layers are going to look as you lock them:

- Make sure you are still in your mouth layer and draw your mouth.
- Make any desired shape tweens to the mouth.
- Now just keep repeating the process of adding and locking layers until you've completed a face.
Project: Mr. Potato Head
Make a full face with functioning parts that change shape. Use different layers for each part of the face. For example, use a layer for the left eyebrow and a different layer for the right eyebrow. Use shape tweening to make them wiggle. Name all your layers with appropriate names.
<< Back to Skyline